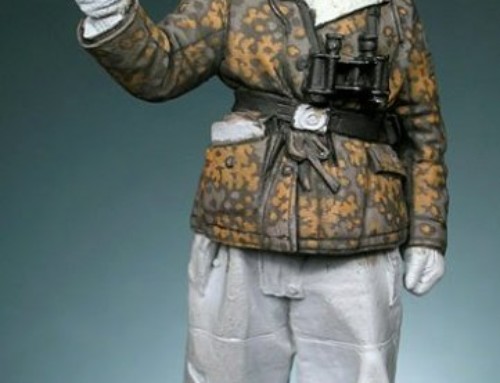
My friend Bob Bethea has been helping me learn the fine art/madness that is figure painting. I’ve been collecting tips and tricks that I’ve learned, but he recently published an article in our local Austin Scale Modelers Society club newsletter. It was a great read, and a great overview of the instruction he’s been giving me. With permission, I’m republishing here.
Thoughts on Figure painting by Bob Bethea
For your first figure you should choose one that is well sculpted and of a subject that will keep your interest. A good sculpture will make it EASIER to paint, and the affection for the subject will keep you at it until you finish. The average person feels that they should start on a cheap figure and work up to the “good”, expensive ones. That is a total misconception as you cannot make a silk purse from a sow’s ear, as they say.
A good figure has sharp detail, good anatomy, and a face with visible features, all of which make the painting MUCH easier. Some of the best painters cannot make an old Tamiya figure look anything but mediocre. The medium is unimportant. Figures are cast in metal, resin and plastic. The metal and resin figures are generally more detailed and thus more expensive because the process allows more detail to be retained. However, plastic figures can be made very presentable with extra work, such as substituting an aftermarket head (the best of which are from the Hornet Company.
Invest in the best you can buy. You can always strip it and start again, but I recommend keeping your first effort intact. As the years go by you can go back to it when you think you have not improved and prove to yourself that you have.
Figure Preparation
Open the box and make sure all the pieces are there. Then test fit and clean off the seams. Just like any injection molded item there are always seams to address. Some resin figures are drop molded and have very few seams. But remember they have to get it out of the mold, so there will be some seams. I use folded sandpaper to address the curved areas that characterize figures.
- Glue as many parts together as you can and fill the seams. This keeps you from having to adjust and repaint later during final construction.
- Seam filling is easy with Tamiya putty thinned with Testor’s liquid cement. You can mix it up in the top of the putty tube with the supplied brush and paint it right onto the figure. It works for resin, metal, and even plastic figures.
- Wipe off the excess instead of sanding to keep the detail on the figure. When thinned, the putty shrinks some, so several applications may be needed.
- Drill a hole in the bottom of each of the feet of the figure, and glue in brass or steel rod. This allows you to mount the figure on a temporary base and later onto the permanent base.
- Don’t be tempted to use the stubs cast onto the bottom of some figures’ feet, as you want a substantial connection with your base, to minimize future accidents.
- Prime your figure. It shows any errors you have made in construction and allows them to be fixed BEFORE the critical paint job goes on. It also provides a uniform canvas on which to paint, and allows the paint to adhere properly. I use the cheapest primer, Touch –n-Tone [Jake’s Note: read my review of this great primer], sold by Advance Auto Parts or even on Amazon. Its light gray, smooth, thin, and sets up in 30 minutes.
Preparing to paint
Attach the figure to the working base via the pins in its feet. I always add white or super glue to insure the attachment. You can easily break it loose when the painting is done to attach it to the permanent base.
For the working base, I use cheap 2″ x 2″ pine stock cut to various lengths and drilled to match the figure. Pine is relatively heavy, but be careful not to use too long a length, especially on metal figures. This places the center of balance too high which may cause an unfortunate fall. If you paint plastic or resin figures, you can get 2×2 balsa blocks, as weight is not as critical.
Reference Material
Most figures come with either a color reference list or photo of the figure painted by an artist, also known as “box art.” Those can be used, but it is also very rewarding to do your own research to insure a period correct depiction of the soldier or historical figure. There are tons of books on every subject and many can be had on loan from fellow modelers. Learning about your subject also lets you focus on providing correct typical groundwork for your base as well.
Choosing paints
There are several types of paints that can be used for painting your figure. Acrylics are water based, don’t smell, and dry quickly. They are all the rage right now and any color in the rainbow is available. However, they take getting used to, as their quick drying requires special techniques for blending colors where they meet.
Brands of hobby acrylics include, Andrea, Vallejo and Reaper. Try to avoid the cheap “craft” acrylics as sometimes they do not hold up well over time. I like Reaper for its intense color, cheap price, easy availability and smooth consistency. Other painters have other preferences based on their own experiences, but any brand works equally well.
- When thinning acrylics, use distilled water to keep from getting the Central Texas ‘salts’ in your paint. Those dissolved salts and minerals will distort the final colors. When thinning oils and enamels, I use white spirit (Walmart’s “PaintThinner”) which dries a little faster and flatter without the gummy buildup of turpentine.
Oil paints are a more traditional medium. They were used originally for canvas art but were transferred to the miniature figure, along with the techniques of highlighting and shadowing, and directed lighting.They dry extremely slow leaving a lot of time to blend between colors but their thinners can smell bad. Their pigments are stronger and more intense. Some painters actually intensify their acrylic paint jobs with a little oil to give the result more kick.
- Never buy STUDENT colors. Although cheaper, they do not work nearly as well as the ARTIST colors, which have stronger, finer ground pigment. They are relatively expensive but go a LOOONG way. I have some tubes that are 50 years old and still are functional.
- Blending is different and uses different techniques. Slow drying makes the project longer and sometimes they dry shiny and will need a matting agent. Winsor-Newton and Rembrandt both make great oil paints.
Figures can also be painted well with hobby enamels. It is the artist not the medium that makes for a well painted figure. These are in between acrylics and oils. Like acrylics, they dry relatively fast and are blended similarly. Like oils, they use smelly thinner but can be mixed with oils. It was the medium used by the first figure painters. They are easily available and relatively cheap, but sometimes have poor shelf life. Options include Humbrol and Testor’s.
Brushes
Whatever medium you choose, you will need a good brush. The erroneous assumption is that the smaller the brush, the better detail it can paint. That is untrue. It is the POINT that determines the detail that can be painted. The super small brushes carry so little paint that they often do not have enough to finish the item you are working on.
I recommend RED SABLE brushes, with hair from the Russian weasel of that name. They keep their point and have enough bulk to actually carry paint to the figure. I would not buy brushes smaller than 00. I have some 0’s 00’s and 1’s for painting small figures and never have needed smaller. 000 and 0000 are too small to hold paint. After every use wash your brushes with soap and water and store them so that the point is not bent. I use Winsor and Newton Series 7 (the Rolls Royce of Brushes), but with good care they last three times as long as the cheap ones. Another option are DaVinci brushes.
Paint palettes
Paint palettes depend on the medium you using. With acrylics, you can use a dish with multiple dents, and keep each paint active (alive) by constantly adding minute drops of water.
You can also use a “wet palette” which keeps the paint alive via osmosis. Start with a plastic sandwich box (Tupperware, etc.) with a lid. Add a sponge and on top of that place palette paper (from Michaels or other art supply stores). Soak the sponge and the water wicks up through the palette paper to keep the paint alive. Cover at night and you can use the paint again tomorrow.
For oils, you can use wax or freezer paper from the grocery store. At night, put it in the freezer and it will last indefinitely.
Getting started
You now have a completely built, primed figure with filled seams, and know what colors you want each part to be, but what do you do now?
You can start anywhere you like. All painters have their own opinion of this. Fellow figure painter, Rick Rutter and I start with the face. If that works, the rest of the figure will work. Another well-known figure painter, Doug Cohen ends with the face as it’s his favorite part and he wants to save the best for last. Henry Nunez paints the uniform because that is what he loves best. He does the face because he has to.
I recommend the face first, as that is the part the viewer will look at first. That is how we rec- ognize other full sized humans and people carry that over to small scale humans. Get it right and the rest falls into line. Get it wrong and you can still strip and paint it without ruining a perfect uniform.
- As the eyes are the ‘window to the soul’, so to speak, I paint them in acrylics so that they cannot be messed up when I paint the skin with oils. You can use thinner to wipe them out should paint spill over into them.
- The most important aspect of painting eyes is symmetry. They must be the same size and track the same. On some 54mm and 1/35 figures the eyes are little more than slits and a dab of putty may be needed to enhance them.
- The whites should not be white. They should be painted a very light flesh color to avoid that ’Popeye’ look. Eyes are also more of a wedge than oval in shape and the iris is barely in contact with the lower eyelid but partially covered by the upper lid.
- A trick employed by Shep Paine is to paint a vertical band of dark blue or brown the same distance from the nose. Then paint a smaller band of black down the center for the pupil. Then cut the top of each eye band with a dark brown (upper eye lash). Next, cut the bottom inside of each eye band with a lighter brown (lower eye lash). Then you can clean them up with flesh colors. Too dark a line for the lower eye lash can look like mascara.
- Painting the eyes it is best to start with the most difficult first and match the easier one to it. If you’re right- handed the left eye is the tough one. Let them dry over night when your satisfied with the results.
- Always do the feet and headgear last as they get the most handling during the process and you don’t want to keep painting the same item over and over.
Lighting
Shadows and highlights will be discussed at a later time, but suffice to say, that they are the difference between a toy soldier and a great figure. The human body is scaled down, so the light hitting it needs to be accentuated. The convention is to assume a light directly from overhead (Zenithal Lighting) and accentuate the results of that with tones of paint.
One way to understand the process is to take a figure and spray black paint upwards onto the figure from underneath then spray white paint from above the figure onto its head, shoulders and other parts. Stand back and observe. The black sections are where the shadows go, and the white are where the highlights are painted.
Keep at it
Remember this is a hobby. Strive to get better. Pick the minds of the great modelers that you respect, either online in print or in person.
Practice and more practice will improve your painting. Always buy the best and avoid the bad. It takes time and patience to get better. Observe the work of others at shows, and sit down and paint with a good painter.
Recommended reading
- Building And Painting Scale Figures by Shep Paine; Kalmbach Publishing
- How To Build Dioramas (Chapter Five) by Shep Paine; Kalmbach Publishing
- Painting Miniatures by Danilo Cartacci: Auriga Publishing
- Fallschrimjagers by Jamie Ortiz; Osprey Publishing


[…] My first response is my friend, Bob Bathea. He’s local to Austin like I am, and a great figure painter and teacher. Check out more about him here and here. […]